This comprehensive guide will walk you through the step-by-step process of using a digital camera, from setting it up to capturing stunning photos. Whether you’re a beginner or an experienced photographer, this article will provide you with the essential tips and techniques to master your digital camera and elevate your photography skills. We’ll cover everything from understanding your camera’s features to mastering advanced techniques like exposure and composition, ensuring you have the knowledge to capture breathtaking images with your digital camera.
Digital cameras have revolutionized the world of photography, providing users with the ability to capture high-quality images with ease. From the latest mirrorless models to the classic DSLR, digital cameras offer a wide range of features and functionalities that can seem daunting at first. However, by following a step-by-step approach, you’ll be able to quickly familiarize yourself with your digital camera and start producing professional-level results.
Key Takeaways
- Understand the basic features and controls of your digital camera
- Learn how to set up and prepare your camera for use, including charging the battery and inserting a memory card
- Explore the different shooting modes and how to adjust camera settings to suit your needs
- Discover techniques for focusing, exposure, and composition to capture stunning images
- Familiarize yourself with flash photography and how to use it effectively
- Learn how to review, transfer, and manage your digital photographs
- Continually practice and experiment to hone your photographic skills
Understanding Your Digital Camera
Before you dive into capturing stunning images with your digital camera, it’s essential to familiarize yourself with its body and controls. Explore the various buttons, dials, and switches, and understand their functions to ensure you can operate your camera effectively.
Exploring Camera Body and Controls
Take the time to study the layout of your digital camera. Locate the power button, shutter release, mode dial, and any other prominent controls. Understand how these features work together to adjust settings like aperture, shutter speed, and ISO. Familiarize yourself with the placement and purpose of each button or dial to streamline your photography workflow.
Identifying Essential Camera Features
In addition to the controls, it’s important to identify the essential components of your digital camera, such as the lens, viewfinder, LCD screen, and battery compartment. Understand how these features contribute to the overall performance and functionality of your camera. Knowing the purpose and operation of each element will help you make informed decisions when using a digital camera step by step.
By taking the time to explore your camera’s body and controls, as well as identify its essential features, you’ll be well on your way to mastering the fundamentals of digital camera basics. This understanding will serve as a solid foundation as you continue to develop your photography skills.
Setting Up the Camera
Preparing your digital camera for use is a critical first step in your photography journey. To get started, focus on two essential tasks: charging the battery and inserting the memory card. By ensuring your camera is powered and ready to capture, you’ll be able to take stunning photos without interruption.
Charging the Battery
Locate the battery compartment on your digital camera and insert the battery, making sure it is fully charged. This will provide the necessary power for your camera to function and allow you to capture a wide range of images without having to worry about the battery running low. Consult your camera’s user manual for specific instructions on how to charge the battery and monitor its charge level.
Inserting Memory Card
Next, insert a compatible memory card into your digital camera. This will give you the storage capacity to save the photos you take. Locate the memory card slot, typically on the side or bottom of the camera, and gently insert the card until it clicks into place. Be sure to use a memory card with sufficient storage space to accommodate your photographic needs, whether you’re capturing a few shots or planning an extensive photo session.
By taking the time to charge the battery and insert the memory card, you’ll have your digital camera ready to capture all your photographic moments without any interruptions or limitations. This simple setup process will ensure a seamless and enjoyable photography experience as you begin to explore the capabilities of your camera.
How to Use a Digital Camera Step by Step
To begin using your digital camera, the first step is to turn it on. Locate the power button, typically found on the top or side of the camera body, and press it to power on your device. This will activate the camera and prepare it for operation.
Turning on the Camera
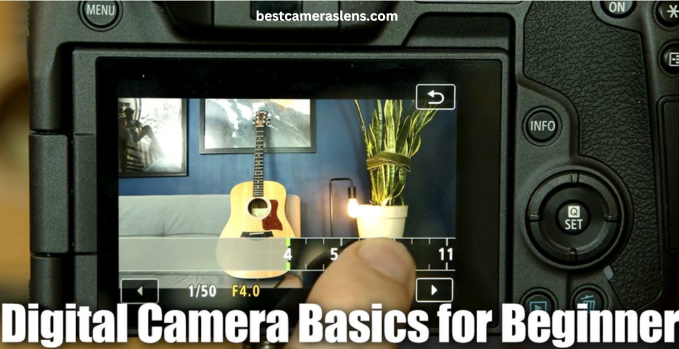
Once the camera is powered on, you’ll notice the LCD screen come to life, displaying various information about the camera’s settings and current status. This is where you’ll be able to preview your shots and access the camera’s menu system to adjust various settings.
Adjusting Camera Settings
With your digital camera now turned on, it’s time to familiarize yourself with the different settings and customizations available. Explore the camera’s menu system to adjust parameters such as image resolution, white balance, and ISO sensitivity. These settings will have a significant impact on the quality and appearance of your photos, so take the time to understand how they work and experiment to find the optimal configuration for your shooting needs.
By following these step-by-step instructions, you’ll be well on your way to mastering the basic operation of your digital camera. Remember to practice regularly, experiment with different settings, and explore the full capabilities of your camera to capture stunning images that showcase your photographic skills.
Mastering Camera Modes
Your digital camera likely offers a range of shooting modes, each designed to optimize the settings for specific photographic scenarios. Exploring these modes can help you capture stunning images in a variety of situations, from candid snapshots to professional-grade portraits.
Auto Mode
The Auto mode is an excellent starting point for beginners or those who prefer a hands-off approach to photography. In this mode, the camera automatically adjusts the aperture, shutter speed, and ISO to achieve the best possible exposure for the current lighting conditions. This mode is ideal for capturing how to use a digital camera step by step in fast-paced or unpredictable situations where you don’t have time to adjust the settings manually.
Manual Mode
For those seeking more creative control, the Manual mode offers complete control over the camera’s exposure settings. By manually adjusting the aperture, shutter speed, and ISO, you can achieve specific photographic effects, such as how to use a digital camera step by step nikon for blurring the background or freezing motion. This mode is particularly useful for how to use a camera for photography in challenging lighting conditions or when you have a specific creative vision in mind.
Scene Modes
Many digital cameras also offer a variety of Scene modes, which are pre-configured settings optimized for specific photographic scenarios. These modes can be particularly helpful for beginners or those seeking to capture specific types of images, such as portraits, landscapes, or low-light shots. By selecting the appropriate Scene mode, the camera will automatically adjust the settings to produce the best results for that particular how to use a digital camera step by step environment.
Focusing Techniques
Mastering the art of focusing your digital camera is a crucial skill for capturing sharp, in-focus images. Whether you’re a beginner or an experienced photographer, understanding the fundamentals of focusing techniques can greatly enhance the quality of your photographs. In this section, we’ll explore the two primary focusing methods: Auto Focus and Manual Focus.
Auto Focus
The Auto Focus feature on your digital camera is designed to automatically adjust the focus based on the subject you’re photographing. This convenient function can be especially useful when capturing fast-moving subjects or when you need to quickly capture a moment without the need for manual adjustments. By simply pressing the shutter button halfway, your camera will detect the primary subject and adjust the focus accordingly, ensuring your photos are sharp and in focus.
Manual Focus
While Auto Focus is a valuable tool, sometimes you may need to take control of the focusing process to achieve a specific look or effect. The Manual Focus option allows you to fine-tune the focus to your exact needs, whether you’re capturing a close-up shot, trying to blur the background, or adjusting the focus to a specific point in the frame. By taking the time to master manual focusing, you’ll gain greater creative control over your photography and be able to capture images that are tailored to your artistic vision.
Regardless of whether you choose to use Auto Focus or Manual Focus, the key to capturing sharp, in-focus images is to understand the capabilities of your digital camera and practice regularly. Experiment with different focusing techniques, and don’t be afraid to try new approaches to find what works best for your specific photographic style and needs.
Exposure Essentials
Mastering the art of digital photography requires a deep understanding of the fundamental elements of exposure. Aperture, shutter speed, and ISO are the three pillars that work together to create the perfect balance of depth of field, motion blur, and image quality in your photographs. By learning how to adjust these settings, you’ll gain the ability to capture images that precisely reflect your creative vision.
Aperture and Depth of Field
The aperture, or the size of the opening in the lens, plays a crucial role in determining the depth of field in your images. A wide aperture (small f-number) will result in a shallow depth of field, blurring the background and keeping the subject in focus. Conversely, a narrow aperture (large f-number) will create a deeper depth of field, keeping more of the scene in sharp focus. Experiment with different aperture settings to achieve your desired level of background blur and subject emphasis.
Shutter Speed and Motion Blur
The shutter speed, or the amount of time the camera’s shutter is open, controls how much motion is captured in your photographs. A fast shutter speed can freeze action, while a slow shutter speed can introduce creative motion blur effects. For example, using a slow shutter speed when photographing a moving subject can create a sense of dynamism and movement in the image. Mastering shutter speed will allow you to convey the mood and emotion you want to capture.
ISO and Image Noise
The ISO setting determines the camera’s sensitivity to light. A higher ISO value allows you to use faster shutter speeds or smaller apertures in low-light conditions, but it also increases the likelihood of image noise or graininess. Experiment with different ISO settings to find the right balance between image quality and your desired exposure. Understanding how to manage ISO will help you produce clean, high-quality images in a variety of lighting conditions.
By understanding and manipulating these three exposure elements, you’ll unlock the full potential of your digital camera and be able to create stunning, professional-looking photographs that capture the world around you in compelling and creative ways.
Composition Tips for Better Photos
Composition is a crucial aspect of photography, as it can make the difference between a good photo and a great one. By understanding and applying various compositional techniques, you can create visually compelling images that draw the viewer’s eye and create a sense of balance and harmony. Let’s explore some of the key composition tips to help you elevate your photography skills.
Rule of Thirds
The rule of Thirds is a fundamental composition guideline that suggests dividing the frame into a 3×3 grid and positioning the main subject or focal point along the intersecting lines or at the edges of the frame. This approach helps create a more balanced and visually appealing image, as it avoids placing the subject in the center of the frame, which can sometimes appear static or uninteresting. When using a digital camera step by step with pictures, be mindful of the rule of Thirds to compose your shots and guide the viewer’s attention to the most important elements in the frame.
Leading Lines
Leading lines are compositional elements that draw the viewer’s eye through the image, guiding them towards the main subject or leading them through the frame. These lines can be created by natural elements in the environment, such as roads, rivers, or fences, or they can be introduced through man-made structures, like architecture or patterns. By using a camera for photography and incorporating leading lines into your composition, you can create a sense of depth and lead the viewer’s gaze towards the focal point of your image.
Framing and Symmetry
Framing and symmetry are powerful compositional techniques that can add visual interest and balance to your photographs. Framing involves using elements within the frame, such as doorways, windows, or natural formations, to create a “frame” around the subject, drawing the viewer’s attention and creating a sense of depth. Symmetry, on the other hand, involves the even and balanced distribution of elements within the frame, creating a visually harmonious and pleasing composition. Experiment with these techniques as you use a digital camera step by step with pictures to capture stunning and visually captivating images.
Also Read:
How to Choose Best Camera For Product Photography
What is the Best Camera For Landscape Photography
Flash Photography Basics
Mastering the use of flash photography can greatly enhance your how to use a digital camera step by step, how to use a camera for beginners, and how to use a camera for photography. Whether you’re shooting in low-light conditions or aiming to create more dramatic lighting effects, understanding the basics of flash photography is essential for any aspiring photographer.
Using Built-in Flash
Most digital cameras come equipped with a built-in flash, which can be a convenient and easy-to-use option for quick snapshots or fill-in lighting. Familiarize yourself with the location of the flash button or switch on your camera, and experiment with different flash settings to achieve the desired lighting in your photos. Keep in mind that the built-in flash has limited range and power, so it may not be suitable for all shooting scenarios.
External Flash Options
For more advanced flash photography, consider investing in an external flash unit. These standalone flash devices offer greater power, flexibility, and control over your lighting. Explore the compatibility of your camera with different external flash models, and learn how to mount, position, and adjust the flash to create the ideal lighting conditions. Experimenting with off-camera flash techniques can open up a whole new world of creative possibilities for your how to use a digital camera step by step, how to use a camera for beginners, and how to use a camera for photography.
Shooting in Different Scenarios
The beauty of using a digital camera lies in its versatility. Whether you’re capturing breathtaking landscapes, stunning portraits, or captivating low-light scenes, the right techniques can help you produce remarkable images in a variety of environments. Let’s explore some key strategies for mastering diverse photographic scenarios.
Landscape Photography
Capturing the grandeur of sweeping vistas and natural wonders requires a keen eye for composition and an understanding of how to handle the challenges of wide-angle scenes. Employ techniques like the rule of thirds, leading lines, and framing to create visually compelling landscape photographs that draw the viewer into the scene. Experiment with different aperture settings to control depth of field and shutter speeds to freeze or blur motion in the landscape.
Portrait Photography
Portraiture is an art form that allows you to capture the essence of your subjects. Utilize your camera’s focus capabilities to ensure sharp, well-defined subjects, and play with depth of field to create a soft, blurred background that emphasizes the focal point. Consider the use of natural or artificial lighting to flatter your subject’s features and create a mood that complements the portrait.
Low-Light Photography
Capturing stunning images in dimly lit environments can be a challenge, but with the right techniques, you can produce breathtaking results. Adjust your camera’s ISO, aperture, and shutter speed to balance the necessary exposure. Explore the use of available light, such as street lamps or candlelight, as well as the application of flash photography to illuminate your subjects without compromising the atmospheric ambiance.
Reviewing and Transferring Photos
After capturing your stunning photos with your digital camera, it’s important to review them on the camera’s LCD screen. This allows you to check the quality of your shots and make any necessary adjustments before moving forward. Whether you’re a beginner or an experienced photographer, this step-by-step process will ensure you get the most out of your digital camera and your photography skills.
Viewing Photos on the Camera
Once you’ve captured your photos, take the time to review them on the camera’s LCD screen. Carefully examine each image, checking for proper exposure, focus, and composition. This will give you the opportunity to make any necessary adjustments to your camera settings or shooting technique before moving on to your next shot.
Transferring Photos to a Computer
After reviewing your photos on the camera, the next step is to transfer them to your computer for further editing, storage, and sharing. Connect your digital camera to your computer using the provided USB cable, and follow the on-screen instructions to import your images. This will allow you to backup your photos, share them with friends and family, and even perform advanced editing to bring out the best in your how to use a digital camera step by step and how to use a camera for beginners.
Conclusion
By following the step-by-step instructions outlined in this comprehensive guide, you now have the knowledge and skills to effectively use your digital camera and capture stunning photos. Whether you’re a beginner or an experienced photographer, this article has provided you with the essential tips and techniques to master your digital camera and elevate your photography skills.
Remember to continue practicing, experimenting, and learning to further develop your photographic abilities. Explore the various camera modes, focusing techniques, and exposure essentials to unlock the full potential of your camera. Additionally, pay attention to composition, flash photography, and shooting in different scenarios to create visually compelling images that captivate your audience.
As you continue on your photography journey, embrace the process of reviewing and transferring your photos to ensure you’re achieving the desired results. With dedication and a willingness to learn, you’ll be well on your way to becoming a skilled digital camera user and capturing unforgettable moments. Happy shooting!
FAQ
What is the first step in using a digital camera?
The first step in using a digital camera is to familiarize yourself with the camera body and controls. Explore the various buttons, dials, and switches, and understand their functions. Identify the essential features of your camera, such as the lens, viewfinder, LCD screen, and battery compartment.
How do I prepare my digital camera for use?
To prepare your digital camera for use, you need to charge the battery and insert a memory card. Ensure the battery is fully charged and the memory card has sufficient storage capacity. This will allow you to capture and store your photos without interruption.
How do I turn on the camera and adjust the settings?
To begin using your digital camera, first turn on the camera by locating and pressing the power button. Then, familiarize yourself with the various settings, such as image resolution, white balance, and ISO, and adjust them to suit your shooting needs.
What are the different camera modes, and how do I use them?
Your digital camera likely offers several shooting modes, each designed for specific photographic situations. Explore the Auto mode, which allows the camera to automatically adjust settings for you, the Manual mode, which gives you full control over exposure, and the various Scene modes, which optimize settings for specific scenarios like portraits, landscapes, or low-light conditions.
How do I focus my digital camera?
Mastering the art of focusing your digital camera is crucial for capturing sharp, in-focus images. Familiarize yourself with the Auto Focus feature, which automatically adjusts the focus based on the subject, as well as the Manual Focus option, which allows you to fine-tune the focus to your specific needs.
What are the essential elements of exposure, and how do I control them?
Understanding the fundamental elements of exposure, such as aperture, shutter speed, and ISO, will help you capture images with the desired balance of depth of field, motion blur, and image quality. Learn how to adjust these settings to achieve your desired photographic effect.
What are some tips for composing better photos?
Composition is a crucial aspect of photography, as it can make the difference between a good photo and a great one. Explore the rule of thirds, leading lines, and framing and symmetry techniques to create visually compelling images that draw the viewer’s eye and create a sense of balance and harmony.
How do I use flash photography with my digital camera?
Mastering the use of flash photography can greatly enhance your images, especially in low-light conditions. Familiarize yourself with your camera’s built-in flash and explore the options for using external flash units to achieve more advanced lighting effects.
How can I capture great photos in different scenarios?
Digital cameras are versatile tools that allow you to capture a wide range of photographic subjects. Learn techniques for landscape photography, portrait photography, and low-light photography to expand your creative options and produce stunning images in various environments.
How do I review and transfer the photos I’ve taken?
After capturing your photos, take the time to review them on the camera’s LCD screen. This will allow you to check the quality and make any necessary adjustments. Once you’re satisfied with your shots, learn how to transfer the photos to your computer for further editing, storage, and sharing.
1 thought on “How to use a Digital Camera Step By Step”