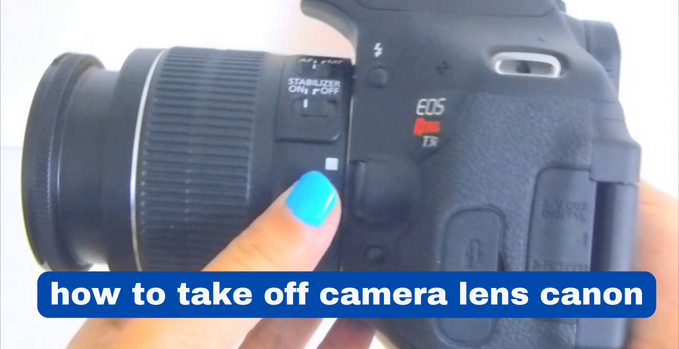
Learn the expert tips for safely removing a camera lens from your Canon device. Our step-by-step guide will teach you how to take off camera lens canon without causing any damage to your valuable equipment. Ensure your photography journey stays smooth and your gear remains in top condition with our comprehensive instructions. Master the art of lens detachment and preserve your Canon camera’s performance for years to come. Start improving your photography skills today with our easy-to-follow tutorial on removing your Canon camera lens.
Understanding the Lens Mount
Before we proceed with the removal process, it’s crucial to understand the lens mount mechanism on a Canon camera. Canon utilizes the EF (Electro-Focus) lens mount system, which is widely popular among photographers due to its reliability and versatility. The EF mount features a bayonet-style attachment that ensures a secure connection between the lens and the camera body.
Steps to Remove the Lens
- Switch Off the Camera: The first step is to power off your Canon camera. This prevents any accidental triggering of the shutter while removing the lens, ensuring the safety of both the lens and the camera.
- Identify the Lens Release Button: Locate the lens release button on your camera body. It is usually marked with a white lens icon and is positioned near the lens mount.
- Press the Lens Release Button: Depress the lens release button using your thumb or forefinger while holding the camera firmly with your other hand.
- Rotate the Lens Counter-Clockwise: With the lens release button pressed, gently rotate the lens in a counter-clockwise direction. You will feel the lens disengage from the camera body.
- Detach the Lens: Once the lens is no longer locked into place, carefully pull it away from the camera body. Be gentle and avoid applying excessive force.
Precautions and Tips
- Avoid Dust and Debris: To prevent dust and debris from entering your camera sensor or lens mount, always remove and attach lenses in a clean and controlled environment.
- Use the Lens Cap: When the lens is removed, quickly cover the lens mount with a lens cap to protect it from any potential damage or exposure to foreign elements.
- Keep the Rear Cap On: Likewise, when the lens is not in use, protect its rear element by placing the rear cap securely.
- Be Mindful of the Contacts: Take care not to touch the contacts on the lens or camera body. These electronic contacts play a vital role in communication between the lens and camera, and any damage to them may affect autofocus and other functionalities.
Conclusion
Congratulations! You’ve learned how to safely remove the lens from your Canon camera. By following the step-by-step instructions and taking necessary precautions, you can maintain the longevity of your equipment and ensure a seamless photography experience. Remember always to handle your lenses with care and store them in a safe, dust-free environment when not in use.
