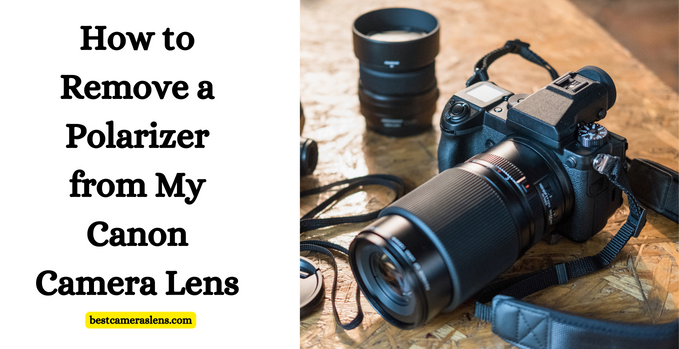
If you’re an avid camera user, you know the importance of using filters to enhance your photography.
One popular filter is a polarizer, which helps reduce glare and improve color saturation in your images. However, there may come a time when you need to remove the polarizer from your Canon camera lens. Whether you want to switch filters or clean your lens thoroughly, we’ve got you covered with this step-by-step guide on how to remove a polarizer from your Canon camera lens.
Why Remove a Polarizer?
Before diving into the removal process, let’s quickly discuss why you might want to remove a polarizer. While polarizers are incredibly useful for certain shooting scenarios, such as landscapes or outdoor portraits, they can limit light transmission and cause vignetting in certain situations. Additionally, if you plan on using other types of filters or simply want to clean your lens thoroughly, removing the polarizer is necessary.
Step 1: Prepare Your Workspace
Before taking any action on your precious camera gear, it’s essential to create a suitable workspace that minimizes the risk of damaging any components. Find a clean and well-lit area where you can comfortably handle your camera and have space for all the tools required for the removal process. Make sure to gather the following items before proceeding:
- A soft microfiber cloth
- A lens cleaning solution (if needed)
- A rubber jar opener or rubber gloves (optional but helpful)
- A pair of tweezers (preferably non-metallic)
- A small precision screwdriver set (if necessary)
Step 2: Power Off and Remove Your Lens
Before attempting to remove the polarizer, ensure that your camera is powered off. This will prevent any accidental damage during the process. If you haven’t already done so, carefully detach your lens from the camera body by pressing the release button (usually located on the side) and twisting the lens counterclockwise until it detaches.
Step 3: Inspect the Lens
Now that your lens is removed, take a moment to inspect its front element. Look for any signs of dust, smudges, or debris that may have accumulated on the surface. If necessary, use a soft microfiber cloth to gently clean the lens before proceeding. Be cautious not to apply excessive pressure or use any cleaning solution that might damage the lens coating.
Step 4: Locate and Loosen the Filter Ring
To remove the polarizer, you’ll need to locate and loosen the filter ring that holds it in place. Look at the front of your lens—the filter ring is usually a thin metallic or plastic ring surrounding the front element. Carefully inspect it to determine how it attaches to your specific Canon lens model.
For lenses with a threaded filter ring:
If your lens has a threaded filter ring, you can simply twist it counterclockwise using your fingers or a rubber jar opener for extra grip. Start by turning it gently but firmly to see if it loosens easily. In most cases, you won’t require any additional tools for this step.
For lenses with a bayonet-style mount:
For lenses with a bayonet-style mount, removing the polarizer requires a slightly different approach. Examine the filter ring closely and identify any screws holding it in place. Use a small precision screwdriver from your set to carefully unscrew these screws without applying excessive force. Once all screws are loosened, you should be able to remove the filter ring by lifting it off from its position.
Remember, each Canon lens model may have slight variations in design, so always refer to your camera manual or consult online resources specific to your lens model if needed.
Step 5: Remove and Store Your Polarizer
With the filter ring successfully loosened or removed, gently lift the polarizer from the lens. Be cautious not to touch the front lens element or apply any unnecessary force that could cause damage. Once removed, it is essential to store your polarizer properly to keep it safe and free from scratches. Consider using a dedicated filter case or a soft microfiber pouch for optimal protection.
Also Read: Sony A6400 Camera Sports Photography Setup
Conclusion
Removing a polarizer from your Canon camera lens may seem like a daunting task at first, but with the right tools and careful execution, it can be easily accomplished. By following the step-by-step guide provided above, you’ll be able to remove your polarizer confidently and safely.
FAQ
How do you remove a Canon lens cover?
Removing a Canon lens cover is relatively easy and can be done in a few simple steps. First, identify the locking mechanism of your particular lens model by examining the front of the lens. Most Canon lenses have either a twist-lock or bayonet mount that holds the lens cover in place. Depending on the type of lock, you’ll need to twist it counterclockwise or press and hold the lock buttons while lifting the cover off.
How do you remove a stuck Canon lens cap?
If your Canon lens cap is stuck, don’t worry. There are a few ways to safely remove it without damaging the lens or cap. Try gently prying the edges of the lens cap with a pair of non-metallic tweezers or use a rubber jar opener for extra grip if needed. If that doesn’t work, try heating up the area around the lens cap and then slowly prying it off as the material expands. If all else fails, consult with a professional camera technician to help you safely remove your stuck Canon lens cap.
How do you remove lens film?
Removing lens film is simple and straightforward. Start by carefully peeling the film away from one corner of the lens with your fingers or a pair of tweezers. Avoid using sharp objects that could scratch or damage the lens surface. Once you have successfully peeled off the film, take a clean microfiber cloth and wipe away any adhesive residue that may remain on the lens. If necessary, you can also use a small amount of lens cleaning solution to remove any stubborn adhesive spots. With your lens clean and clear, you’re now ready to start shooting with it again.
How do you clean the inside of a Canon camera lens?
Cleaning the inside of a Canon camera lens is essential to ensure optimal performance and image quality. Start by powering off your camera and removing the lens, then inspect the front element to make sure it’s free from any dirt or dust particles. If necessary, use a soft microfiber cloth to gently wipe away any debris on the surface. Then, carefully use a lens cleaning solution to clean the inside of the camera lens. Avoid using regular household products like alcohol or ammonia as they may damage the lens coating.
1 thought on “How to Remove a Polarizer From my Canon Camera Lens”
Comments are closed.