If you’ve picked up a Canon M50 and want to dive into the world of vlogging, congratulations — you’ve chosen one of the most beginner-friendly and feature-packed mirrorless cameras on the market.
But the camera alone won’t get you buttery smooth footage, crisp audio, and that YouTube-ready look. The real magic? It’s in your setup.
In this article, we’ll break down the ultimate Canon M50 vlogging setup — including the best budget lenses, must-have mics, lighting options, and pro tips that can help you shoot like a seasoned content creator… even if you’re just starting out.
Why the Canon M50 Is a Vlogger’s Favourite
The Canon M50 became an instant hit with vloggers — and for good reason:
- Compact and lightweight
- Fully articulating screen (perfect for selfies and recording)
- Dual Pixel Autofocus (DPAF) for smooth subject tracking
- Great colour science straight out of the camera
- Clean HDMI output for livestreaming
Whether you’re creating daily vlogs, product reviews, or cinematic B-roll, the M50 gives you the flexibility of a DSLR without the bulk.
What You Need in a Canon M50 Vlogging Setup
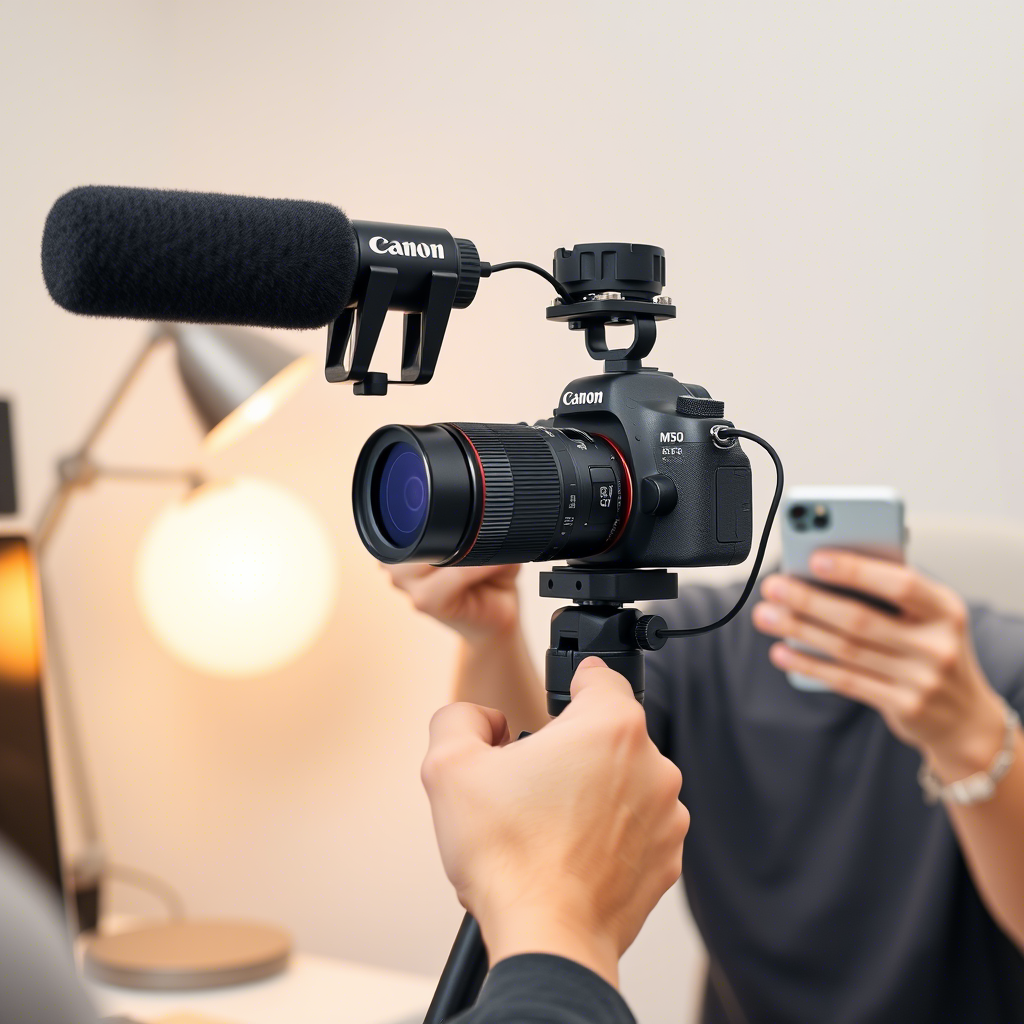
1. Best Vlogging Lens for Canon M50
The M50 uses Canon’s EF-M mount, and while it works with EF lenses via an adapter, EF-M native lenses are lighter and better balanced.
Top Picks:
- Canon EF-M 11-22mm f/4-5.6 IS STM
Perfect for handheld vloggers — wide enough to frame yourself + background. - Sigma 16mm f/1.4 DC DN
Incredible bokeh, low-light performance, and sharpness for interviews and talking heads. - Kit lens (15-45mm)
Decent for starters, but lacks low-light strength.
Pro Tip: If you’re indoors or in low light, the Sigma 16mm is a game-changer.
2. Microphone – Don’t Rely on Built-In Audio
Crisp video doesn’t matter if your viewers can’t hear you clearly.
Best Mics for M50:
- Rode VideoMicro – Compact and excellent quality for its size
- Deity V-Mic D4 Duo – Great if you need to capture both front and back audio
- Wireless Options – Like Rode Wireless GO II for interviews or movement-heavy shots
Mount it on the camera hot shoe and plug it into the 3.5mm mic port.
Also Read:
3. Tripod or Handheld Grip
Stabilisation matters! Nobody enjoys shaky vlogs.
- Joby GorillaPod 3K – Flexible, good for both tabletop and on-the-go
- Ulanzi U-Grip or L-shaped rigs – For accessory mounting (mic, light, phone)
- Compact tripod – Like Manfrotto PIXI for desktop recording
4. Lighting – The Secret to a Professional Look
Even the best camera needs light.
Options:
- Soft LED panels – Like the Ulanzi VL49 for soft facial light
- Ring lights – Easy to use, great for desk setups
- Natural window light – Use it wisely for free, high-quality results
5. Essential Accessories
- Extra batteries – The M50 battery drains fast (buy 2–3 backups)
- Memory cards – Use UHS-I cards, 64GB or higher, Class 10 minimum
- Lens cleaning kit – Dust ruins clarity fast
- Cold shoe mount splitter – If you need to mount both a mic and a light
Canon M50 Setup Examples (Use Case-Based)
| Vlogger Type | Lens | Mic | Tripod |
| Travel Vlogger | 11-22mm | Rode VideoMicro | GorillaPod |
| Beauty YouTuber | Sigma 16mm | Wireless GO | Ring Light + Desk Tripod |
| Food Reviewer | 15-45mm | Deity D4 Duo | Ulanzi L Grip |
Final Thoughts: It’s Not About Gear, It’s About Story
Sure, you can spend hundreds on fancy gear — but your message, energy, and connection with the viewer will always matter more.
The Canon M50 is already a powerful tool. With the right vlogging setup — a sharp lens, clear mic, good light, and steady hands — your content will look and feel professional from day one.